
Most articles on RCC concreting stay at the surface — “use good cement, vibrate properly, cure for a week.” True, but not much use to someone standing on site the morning of a slab pour.
Here’s what actually decides whether your slab lasts decades or starts cracking in year two — real costs, exact spacing numbers, and the small execution details most guides skip.
Quick Takeaways
- Cost: A 1,000 sq ft slab typically runs ₹3–4 lakh, all-in.
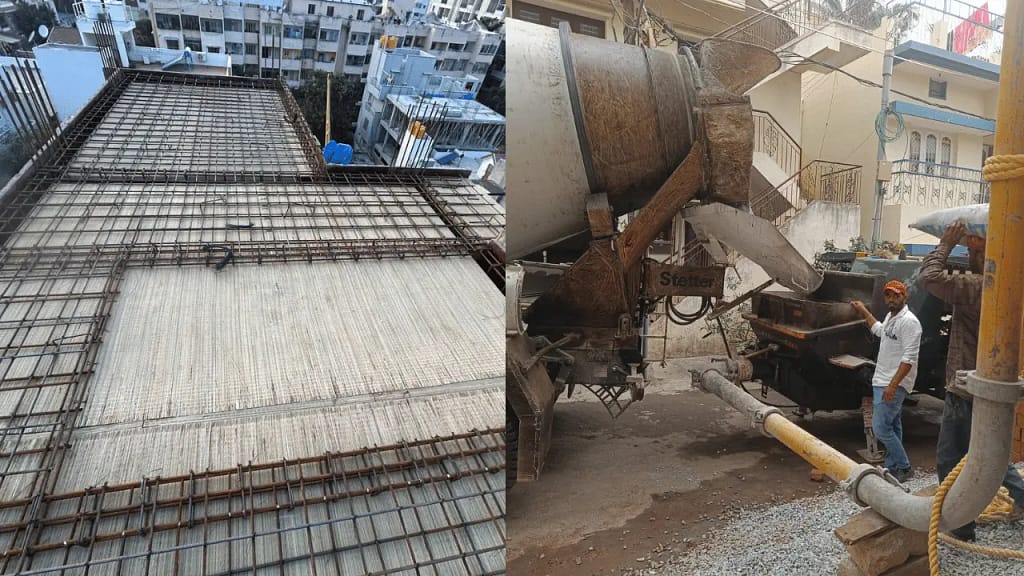
- Two casting methods: RMC truck (2–3 hrs, consistent mix) vs. gang labour (4–5 hrs, more flexible).
- Minimum slab thickness: 140mm (5.5 inches) — never less.
- Bar spacing: Main bars ~150mm apart, distribution bars ~200mm apart.
- Curing: Minimum 7 days, ideally 14 — ponded, not just splashed.
- Non-negotiable: Proper vibration. Skipping it causes honeycombing.
Why RCC in the First Place
Concrete handles compression well but cracks under tension. Steel does the opposite. Combine the two and you get a material that handles both — which is why every column, beam, and slab in a house is built this way. Done right, RCC easily lasts 50+ years.
What a 1,000 Sq Ft Slab Actually Costs
Once you factor in the beam area around it, a 1,000 sq ft house really means casting closer to 1,300 sq ft of slab. All-in — cement, steel, sand, aggregate, centring, and labour — that typically costs ₹3–4 lakh, depending on your city and current material rates. Scale it up or down in proportion to your slab area.
Tip: Always order a little extra sand and aggregate. Cement and steel can be restocked same-day from a local shop, but sand and aggregate come from a crusher and take time. The extra never goes to waste — it’s used later for column raising, tiling, or parapet work.
RMC Truck vs. Gang Labour: Which One Should You Use?
There are two ways a slab actually gets cast, and the choice affects your whole day.
RMC (Ready-Mix Concrete) truck
- Concrete arrives pre-mixed and batch-tested from a plant
- Fastest option — usually done in 2–3 hours
- More consistent mix ratio since it’s machine-batched
- Limitation: depends on plant scheduling and truck access — tight lanes can be a problem
Gang labour (site-mixed)
- A dedicated crew mixes concrete on-site, batch by batch
- Takes longer — typically 4–5 hours
- More flexible on timing, and works where an RMC truck can’t reach
- Limitation: mix consistency depends entirely on the crew’s skill — regular labour mixing manually (the way they’d mix mortar) often throws the ratio off
Whichever you choose, keep a few extra people on standby. Water can run out, power can trip, a vibrator can fail — and someone needs to be free to fix it without stopping the pour.
The Details That Actually Decide Slab Quality
This is the part most guides skip — and it’s where slabs actually go wrong.
Centring and Levelling
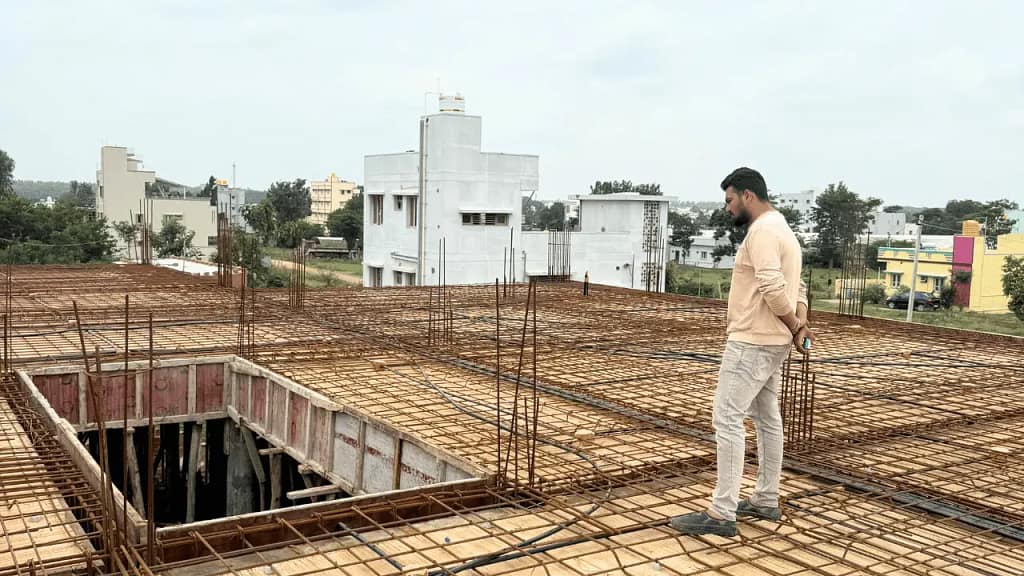
Before anything is poured, check that the centring follows the structural drawing, the zero level is correct, and beam spacing matches the plan. Base plates (mould mats) under the centring props matter more than people realize — without them, props can sink slightly under load and the whole level shifts mid-pour. A carpenter should stay under the shuttering during the pour to catch anything working loose.
A useful trick: beam side shuttering is often given a slight inward tilt (a millimetre or two) before pouring, so the pressure of wet concrete evens it out to plumb instead of pushing it outward.
Electrical and Plumbing First, Not After
Fan box recesses, switch conduits, and plumbing sleeves need to be fixed in place and checked against the drawing a day ahead — not on casting day. Cutting into a finished slab later to run a pipe is a compromise nobody should have to make.
Bar Sizing and Spacing
- Slabs: 10mm and 12mm bars — never 8mm, even if it’s what’s available
- Columns and beams: start at 16mm, going up to 18–20mm depending on load
- Main bars: max 300mm apart by code, but 150mm (6 inches) is the safer, common spacing
- Distribution bars: max 450mm apart by code, but 200mm (8 inches) is typical
Get this wrong and you’re not looking at cosmetic hairline cracks — you’re looking at structural cracks.
Cover Blocks
Standard cover is around 20mm, increasing with slab depth and again in coastal areas where salt exposure corrodes steel faster. The real test: walk across the tied reinforcement before the pour — if a bar touches the shuttering underneath, add support there. Once concrete goes in, any steel touching the formwork gets exposed at the surface later.
Slab Thickness and Concrete Grade
- Minimum thickness: 140mm (5.5 inches) — non-negotiable for a standard residential slab
- Exception: deck-sheet roofing systems, where ~75mm works since the sheet carries load
- Concrete grade: M20 is the residential standard; M25 adds cost with little benefit unless an engineer specifically calls for it
The DIY Slump Check
No lab slump test on hand? Fill a small bucket with mixed concrete, tamp it down, then invert and lift the container. Good concrete holds close to three-quarters of its shape — think thick curd that holds together, not one that runs. If it collapses flat, the mix is too wet or weak. It’s not a substitute for a proper slump cone, but it catches an obviously bad batch.
Vibration Is Not Optional
Skip it, rush it, or run it too briefly, and you get honeycombing — visible gaps where concrete never packed around the steel. Keep a backup vibrator on site; a breakdown mid-pour with no spare means concrete sitting uncompacted.
Timing and Finishing
- Start early — 6 or 7 AM gives the longest working window in cooler conditions
- December–January is the best casting season nationwide
- Don’t over-finish the surface — reworking it repeatedly causes fine air cracks as it dries
Curing: Ponding, Not Splashing
Once the slab is dry enough to walk on, build small brick-and-mortar borders to hold standing water, and keep them filled — never let it dry out between refills. If water drains unevenly due to a slope, break the pond into sections with cross-partitions. Cure for a minimum of 7 days, ideally 14 — that’s roughly when concrete reaches 90% of its final strength. Nothing should go on top before the 7-day mark.
Waterproofing: Only Where It’s Needed
Waterproofing only needs to go on the top roof slab — intermediate floor slabs get tiled over anyway, so it serves little purpose there. A well-proportioned cement-sand-aggregate mix does more for long-term strength than compensating with extra admixture.
Pour-Day Checklist
- Tarpaulins on standby, in case of unexpected rain
- A full water sump or tank, with backup if the borewell alone isn’t reliable
- A spare vibrator
- Two to three standby labourers beyond the minimum headcount
- The day kept free of other commitments — a rushed crew makes more mistakes
Where Slabs Usually Go Wrong
- Centring or prop base not checked for level, causing sagging or uneven surfaces
- Bar spacing or ratio off, leading to genuine structural cracking
- Vibration skipped or rushed, causing honeycombing
- Electrical and plumbing left for “after,” forcing slab-cutting later
- Curing stopped early or ponds left to dry out
- Casting split across two days due to labour or material shortages
How BuildAcre Handles It
Every slab pour is a fully planned event, not something figured out on the day. Centring is checked against drawings before anyone mixes concrete, bar spacing and cover are verified by hand, a full crew with standby labour and equipment is on-site, and curing is tracked daily until the 14-day mark.
If you’re evaluating a builder, ask them to walk you through their slab-day plan in this level of detail. The answer tells you a lot.
Planning a home or want a second opinion on your ongoing construction? Talk to the BuildAcre team for a FREE site visit.